How to DIY a Computer Screen Stand in a short time
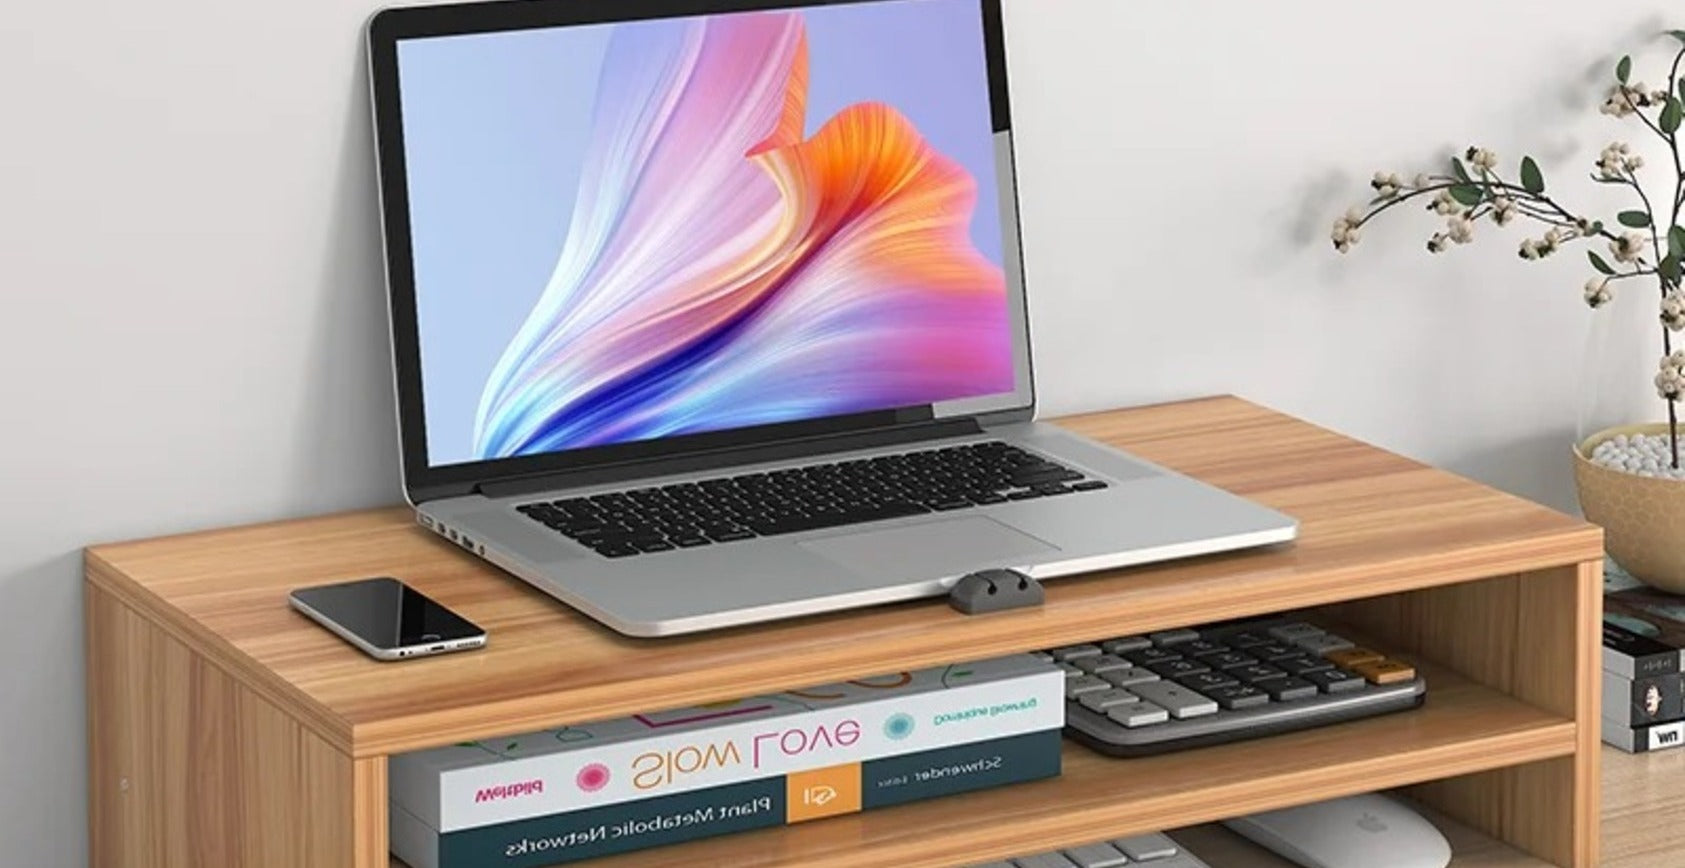
Looking to elevate your home office with a touch of creativity and practicality? A stylish and functional DIY a computer screen stand can transform your workspace, making it not only more organized but also a lot more enjoyable to work in. Imagine a stand that not only complements your desk's aesthetic but also enhances your ergonomic setup. Building your own DIY computer screen stand is a fantastic way to achieve this! Not only will you save money, but you'll also have the satisfaction of creating a custom piece that reflects your personal style and meets your specific needs. In this blog, we’ll guide you through the process of designing and crafting your very own computer screen stand. From choosing the right materials to adding those perfect finishing touches, we’ve got you covered. Let’s dive into how you can create a standout stand that’s as functional as it is fabulous!
The advantages of using computer screen stand
Enhance work efficiency
Using a computer screen stand can significantly improve work efficiency. A screen stand raises the computer monitor, aligning the user’s eyes with the screen at eye level. This setup reduces neck and back strain, mitigating pain and discomfort that may arise from prolonged periods of looking down at the screen. Additionally, the correct screen height can help alleviate eye fatigue and dryness, thereby enhancing productivity.
Improve posture
A computer screen stand can also improve posture. Many people unconsciously hunch over their computers, which puts a strain on the neck and spine. By raising the monitor with a screen stand, users can maintain a naturally upright posture. This not only enhances overall comfort but also helps to prevent posture-related injuries and poor habits caused by long-term computer use.
Save desktop space
With advancements in technology and the diverse functions of computers, people often need to connect multiple devices such as keyboards, mice, and speakers. Without a stand, these devices can take up a significant amount of desktop space, leading to a cluttered and disorganized work area. Using a computer screen stand elevates the monitor to an optimal height, allowing you to maximize desktop space and create a neater, more orderly office environment.

Materials and Tools Needed
Wood: Choose a durable hardwood like oak, maple, or walnut for a sturdy stand. You’ll need a piece large enough to accommodate your monitor and any additional features you plan to add.
Tools: Saw (circular or hand), drill, sandpaper, wood glue, screws and screwdriver, measuring tape, and a paintbrush or roller for finishing.
Additional Supplies: Wood stain or paint (optional), non-slip pads (to prevent the stand from sliding).
Step-by-step instruction
Measure and Plan Your Design
Start by measuring the dimensions of your monitor and your desk space. Determine the ideal height for your screen to be at eye level when seated. Draw a detailed sketch of your design, including dimensions and any additional features like compartments or cable management slots. Common designs include simple rectangular stands or more elaborate ones with drawers or shelves.
Cut the Wood
Using your measurements, mark the dimensions on the wood. For a basic rectangular stand, you’ll need a top piece and possibly one or two supporting pieces for the base. Carefully cut the wood pieces using a saw, ensuring straight and precise cuts. If your design includes angles or custom shapes, use a jigsaw for more intricate cuts.
Sand and Prepare
Smooth the edges and surfaces of your wood pieces with sandpaper. Start with a coarser grit (around 120) and finish with a finer grit (around 220) to ensure a smooth, splinter-free surface. This step is crucial for both aesthetics and safety, as rough edges can be uncomfortable or damaging.
Assemble the Stand
Assemble the pieces using wood glue and screws for added stability. Apply wood glue along the edges where pieces join, and use screws to secure them in place. An electric screwdriver significantly accelerates the assembly process compared to manual screwdrivers. It effortlessly drives screws into wood, reducing the time and effort required to secure the pieces together. This efficiency is especially beneficial when working on larger projects or when you have multiple screws to install. If your design includes a base with supports, ensure the stand is stable by testing it with your monitor before finalizing. Allow the glue to dry completely according to the manufacturer’s instructions. Once assembled, you can choose to stain or paint the stand to match your office decor. Apply a wood stain for a natural look or paint it in your desired color. Use a brush or roller for an even application. If you opt for staining, apply a clear sealant to protect the wood and enhance its durability.

Add Non-Slip Pads
To prevent the stand from moving or scratching your desk, attach non-slip pads to the bottom of the stand. These pads also protect your desk surface from damage.
FAQs
What type of wood is best for a DIY computer screen stand?
Durable hardwoods such as oak, maple, or walnut are ideal because they provide the strength and stability needed to support your monitor. Softwoods like pine can also work but may be less durable over time.
How do I determine the right height for the stand?
Measure the height of your monitor and your desk setup to ensure the screen is at eye level when you are seated. Typically, the center of the monitor should be approximately at eye level to reduce neck strain.
How should I finish the wood?
Apply wood stain for a natural look or paint for a customized color. Use a brush or roller for even application. If you choose to stain, apply a clear sealant to protect the wood and enhance its durability.
Summary
Now, you've just created a beautiful and functional DIY a computer screen stand with an electric screwdriver. By following these steps, you’ve not only enhanced the ergonomics and aesthetics of your desk but also added a personal touch that makes your home office truly unique.
With your new stand, you'll enjoy a more organized and efficient workspace, reduced strain on your neck and back, and a cleaner, more stylish desk. The best part? You’ve done it all yourself! From choosing the perfect wood to adding those final non-slip pads, each step has brought you closer to a workspace that is both practical and visually appealing.
As you sit back and admire your handiwork, take pride in knowing that you’ve created something that will enhance your daily work experience. Whether you’re tackling a big project or just catching up on emails, your new stand will ensure that you’re working comfortably and efficiently.
Thanks for joining us on this DIY journey! We hope you’ve enjoyed the process as much as we did and that your new computer screen stand brings a fresh, functional flair to your office. Happy crafting, and here’s to many productive days ahead in your newly styled workspace!


