


A cordless drill is one of the most useful tools at home—if you know how to set it up correctly. This step-by-step guide shows how to use the HOTO 16V Brushless Drill Tool Kit for common DIY tasks like assembling furniture, hanging shelves, tightening hinges, and drilling clean holes. You’ll also learn when to use Automatic Mode (A) vs. Manual Mode (M), plus simple tips to avoid stripped screws.
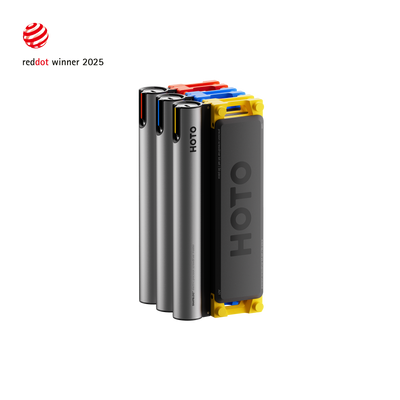
What’s in the HOTO 16V Brushless Drill Tool Kit?

This kit includes the 16V brushless drill plus everyday hand tools and accessories—bits/drill bits, a screwdriver with extension, tape measure, hammer with rubber cap, adjustable wrench, and needle-nose pliers—so you can handle most home repairs with one compact case.
16V Drill Specs:
-
Max torque: 442 lb-in
-
No-load speed: 0–400 r/min (low), 0–1700 r/min (high)
-
Max chuck diameter: 10 mm
-
Battery capacity: 1900 mAh
-
Typical charging time: about 120 minutes (with a 12V⎓2A charger)

Drill Basics: Controls You’ll Use Every Time
1) Install a Driver Bit or Drill Bit (Chuck)
-
Turn the chuck to loosen it.
-
Insert the bit fully.
-
Tighten the chuck firmly so the bit won’t wobble.
Tip: If the bit slips, re-tighten and keep the drill straight (perpendicular) to the screw or surface.
2) Forward / Reverse / Lock (Direction Switch)
-
Forward: tighten screws or drill holes
-
Reverse: remove screws
-
Lock (center): prevents accidental start (use when changing bits or carrying)
3) Drilling vs. Screwing (Function Setting)
-
Screwing: controlled fastening for driving screws
-
Drilling: higher-speed mode for making holes
Automatic (A) vs. Manual (M): Which Mode Should You Use?
Automatic Mode (A): Best for Most Screwdriving
Automatic Mode is ideal for furniture assembly and everyday fastening because it’s simple and consistent—great for beginners.
Use it for: furniture assembly, cabinet handles, hinges, hooks, light home fixes.
Manual Mode (M): 32 Levels for More Control
Manual Mode gives you 32 levels so you can fine-tune output depending on the material and screw size.
Quick rule: Start low (around 1–5) and increase gradually only if needed.

How to Drive Screws Without Stripping?
-
Choose the correct bit type and size.
-
Set direction to Forward.
-
Select Screwing mode.
-
Start with Automatic (A) or Manual (M) low level.
-
Press the trigger slowly at first, keep the drill straight, and stop when the screw is snug.
Common causes of stripped screws:
-
Wrong bit size
-
Drill angled off-center
-
Too much force or speed at the start
-
Over-tightening in soft wood or plastic
How to Drill Clean Holes?
-
Install a drill bit and tighten the chuck.
-
Set direction to Forward.
-
Switch to Drilling mode.
-
Start slowly to “seat” the bit, then increase speed.
-
Back the bit out occasionally to clear dust/chips.
Good to know: Use drill bits that fit the chuck correctly (maximum chuck diameter 10 mm).

Everyday DIY Scenarios
Scenario 1: Assemble Flat-Pack Furniture Faster
-
Best setting: Screwing + Automatic (A)
-
Pro tip: Start the screw slowly until it bites, then continue smoothly. If the screw feels “too tight too soon,” switch to Manual (M) and begin at a low level.

Scenario 2: Hang a Hook, Key Rack, or Shelf
-
Workflow: Measure → Drill → Mount
-
Measure spacing with the tape measure and mark holes
-
Drill holes using Drilling mode
-
Switch to Screwing mode to install screws/anchors
-
-
Pro tip: For cleaner alignment, measure from the same reference edge (like a door frame or cabinet edge) each time.
Scenario 3: Fix a Loose Door Hinge or Handle
-
Best setting: Screwing + Automatic (A)
-
Pro tip: If a screw spins without tightening, the hole may be worn. A simple repair is to reinforce the hole (wood filler/repair method) before re-driving.
Scenario 4: Tighten a Nut or Bolt
Some jobs are better finished with hand tools:
-
Use the adjustable wrench to tighten nuts/bolts
-
Use needle-nose pliers to hold small hardware in place while tightening
Ready to upgrade your home DIY setup? Explore the HOTO 16V Brushless Drill Tool Kit and build your everyday toolkit for repairs, assembly, and projects.


Author: Nova


